If you want Gmail to automatically send emails to another address — or route only certain messages to the right place — you don’t need a workaround or third-party tools. Gmail can already do it with a feature called automatic forwarding.
This is especially useful if you’re switching email addresses, managing multiple inboxes, or tired of manually forwarding the same messages over and over. Instead of handling emails one by one, you can set up automatic rules that redirect messages exactly where they need to go.
Depending on your goal, that might mean redirecting all incoming emails to another account, forwarding only specific messages based on the sender or subject, or automatically moving emails into folders to keep your inbox organized.
In this guide, you’ll learn 3 effective ways to automatically redirect emails in Gmail — using auto-forwarding, filters, and built-in settings that take just a few minutes to set up.
Here’s what we’ll cover:
- When Should You Redirect Emails in Gmail?
- How to Redirect Emails in Gmail
- How to Stop Redirecting Emails in Gmail
Sounds good? Then let’s dive in.
When Should You Redirect Emails in Gmail?
Redirecting emails in Gmail makes sense when you want messages to move automatically — without manual forwarding or constant inbox checking. It’s especially useful in these situations:
- You’re switching to a new email address: Redirecting ensures you don’t miss important messages while people are still emailing your old address.
- You manage multiple inboxes: Automatically routing emails to one main account keeps everything in one place.
- You want to keep your inbox organized: Redirecting or routing certain emails prevents clutter and keeps priority conversations visible.
- You need emails to reach someone else: Useful for shared responsibilities, temporary coverage, or handing off messages without forwarding them manually.
How to Redirect Emails in Gmail
Gmail offers a few built-in ways to redirect emails automatically. You can redirect all incoming messages to another email address using account-level forwarding, or redirect only specific emails by setting up filters.
There’s also a third option that doesn’t send emails to another address but still redirects them internally — by automatically moving messages into folders. Let’s walk through each method step by step, starting with the simplest one.
| Action in Gmail | What it does | Best used when |
|---|---|---|
| Redirect all emails | Automatically sends every incoming email to another address | You’re switching inboxes or consolidating multiple accounts |
| Redirect only certain emails | Forwards emails that match specific criteria | You want precise control over which emails go where |
| Redirect to a folder | Automatically moves emails into a label without forwarding them | You want to keep your inbox organized and clutter-free |
Option #1: Redirect All Emails to Another Email Address
This method is best if you want everything sent to your Gmail account to automatically go to another email address — for example, when switching inboxes or consolidating multiple accounts.
Here’s how to redirect all emails in Gmail:
- Open Gmail.
- Click the gear icon (⚙️) in the top-right corner.
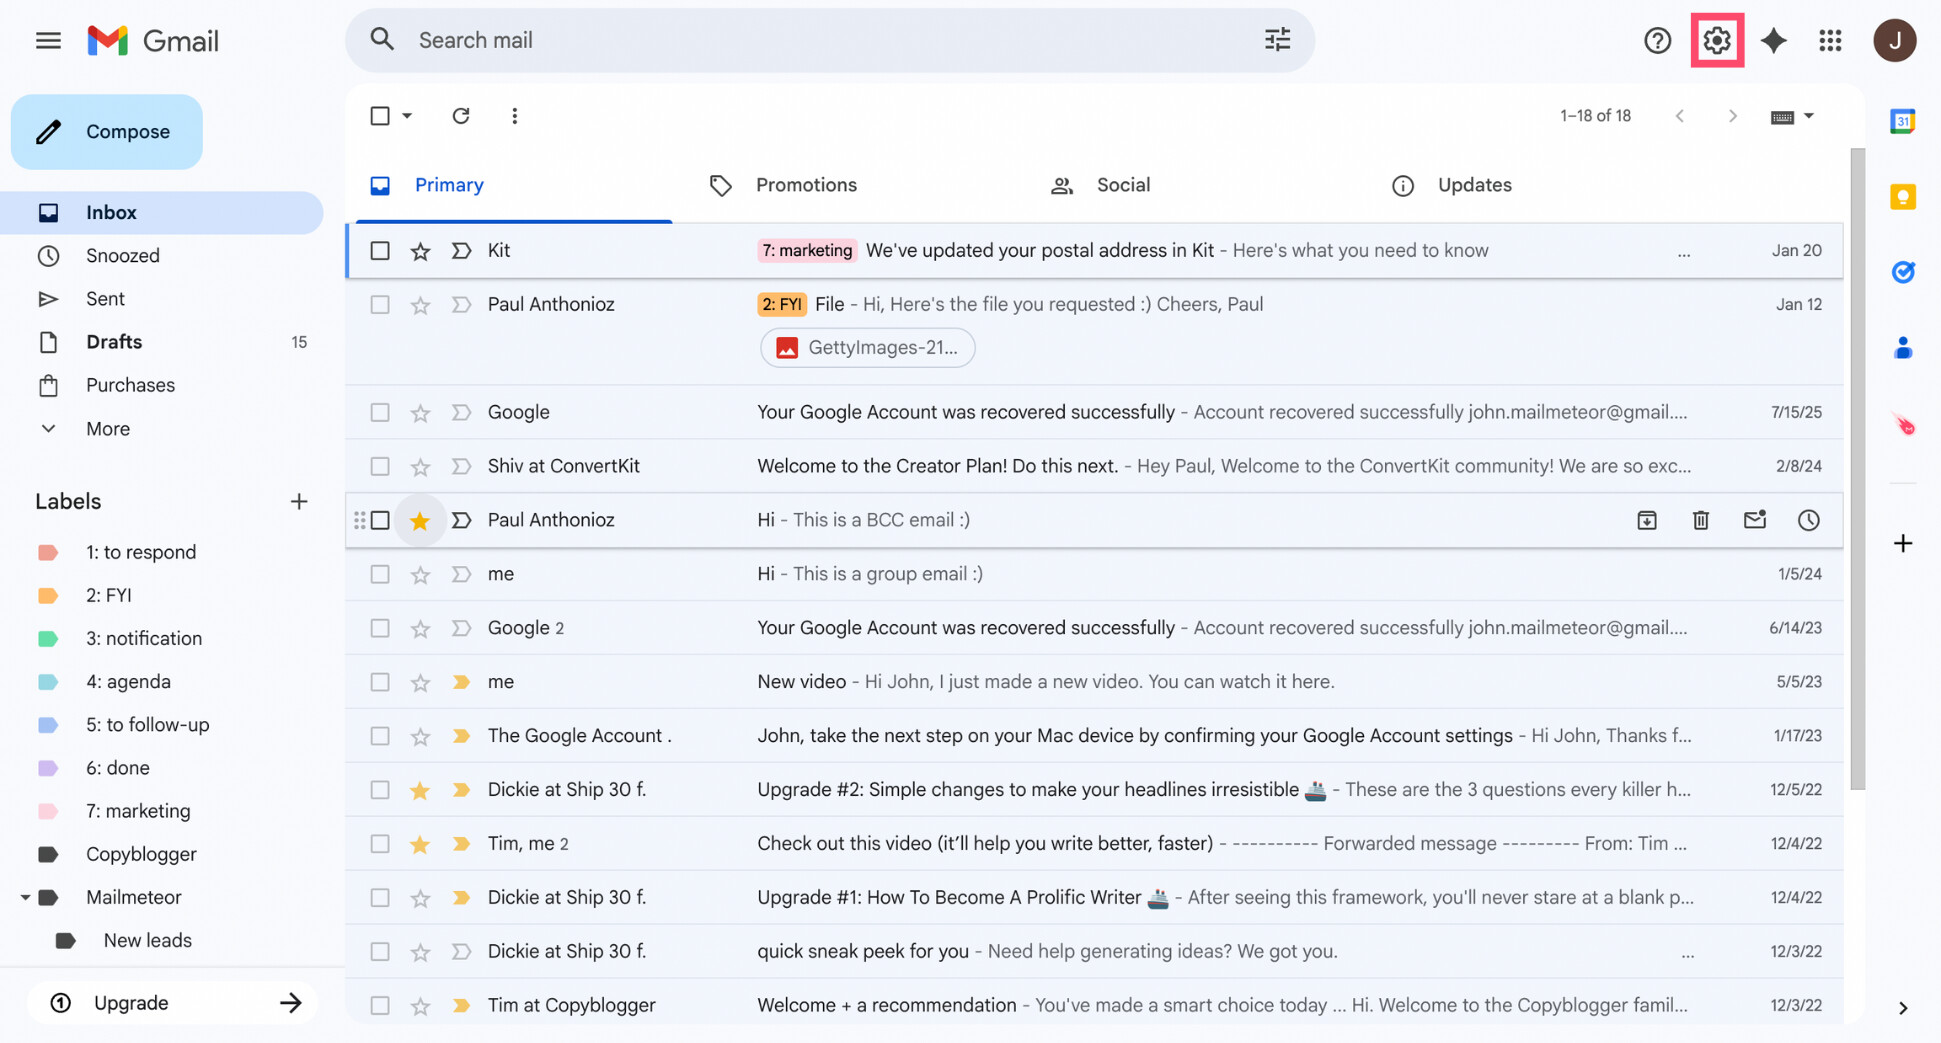
- Select See all settings.
- Open the Forwarding and POP/IMAP tab.
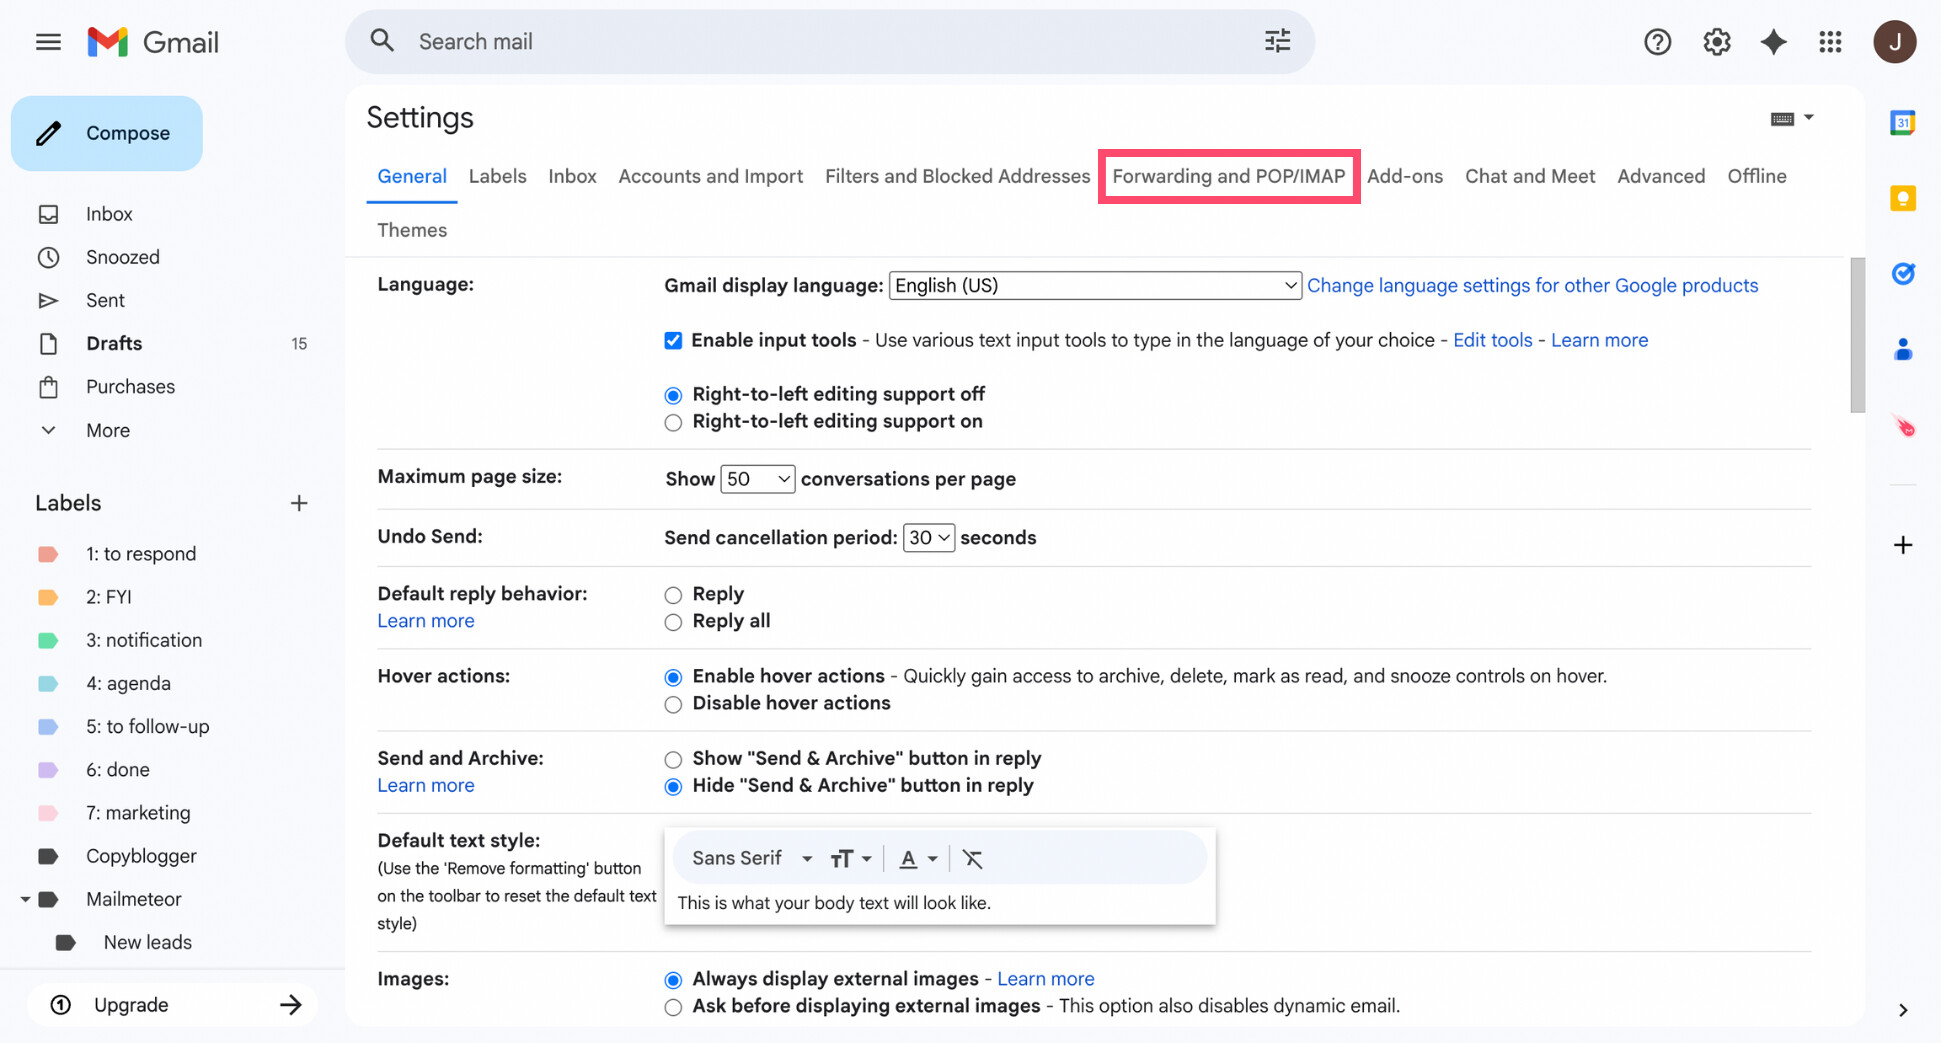
- In the Forwarding section, click Add a forwarding address.
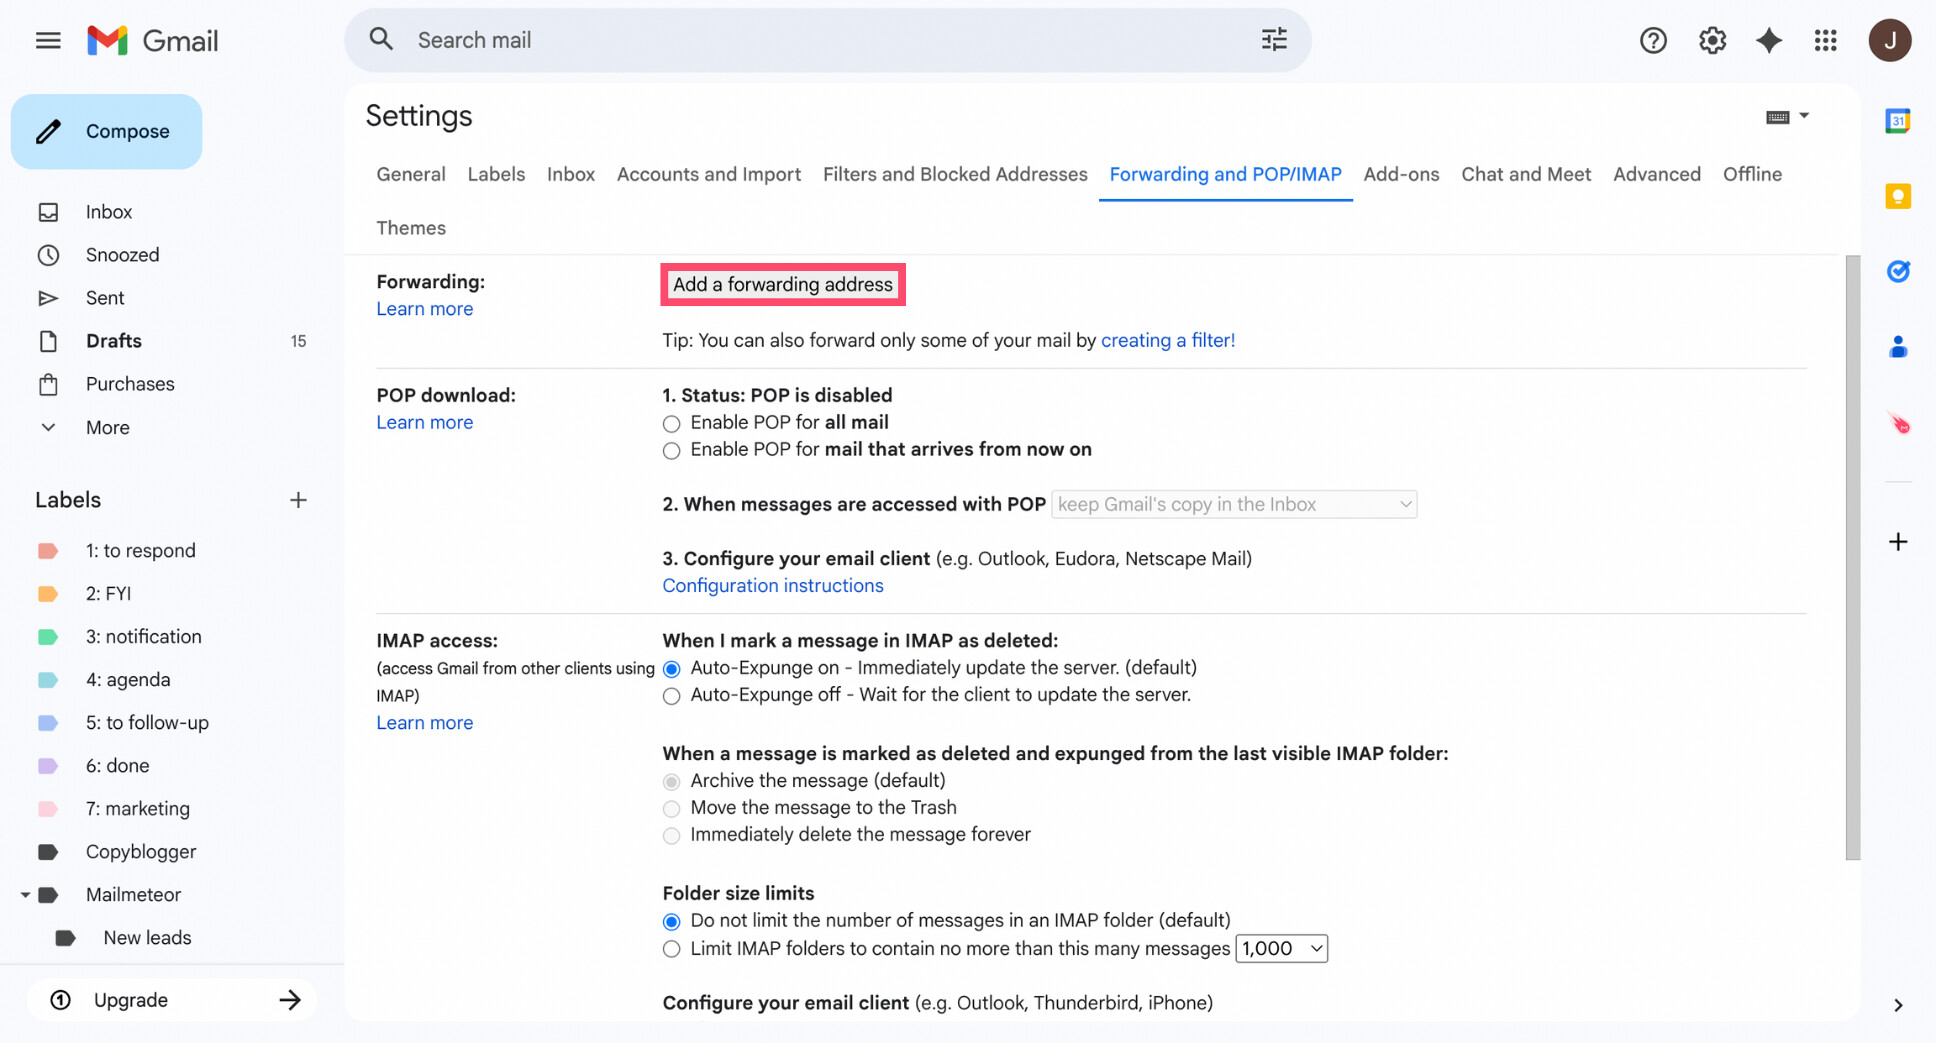
- Enter the email address you want to redirect messages to.
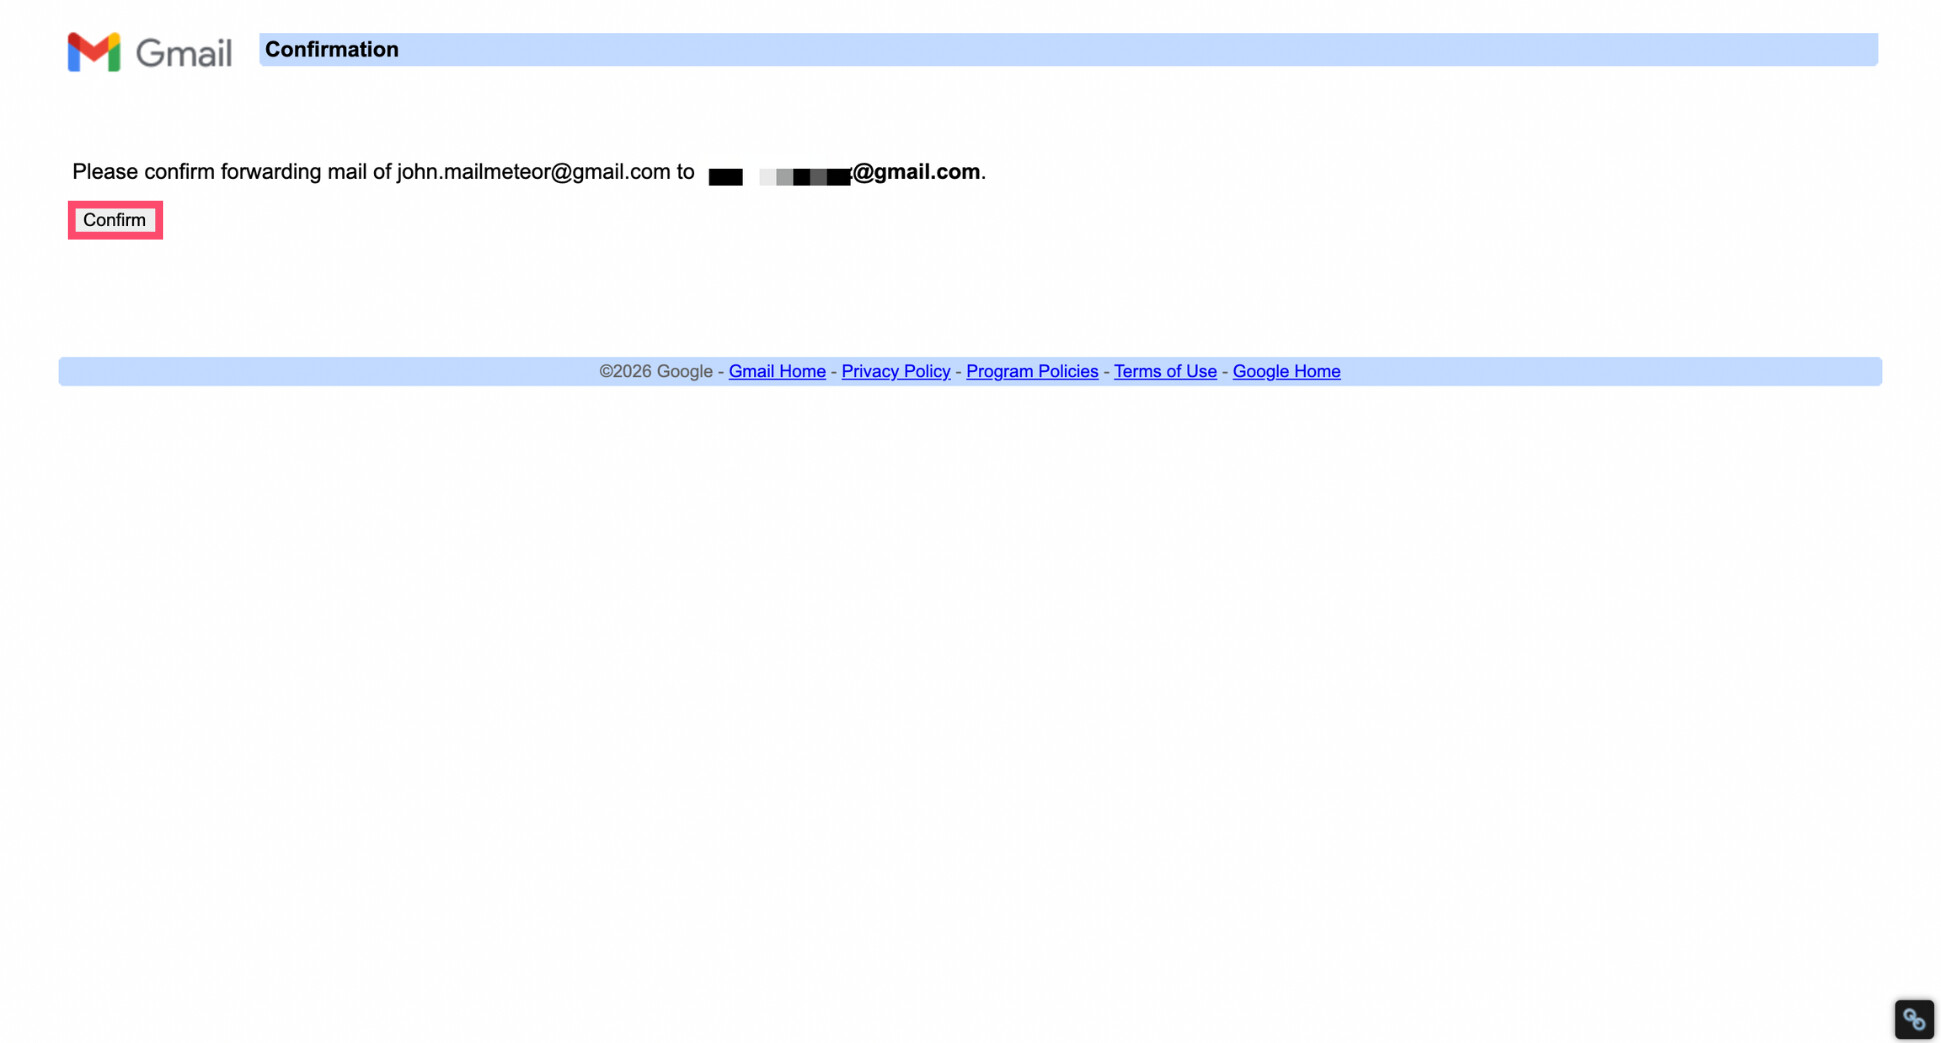
- Click Next, then Proceed, and confirm the request.
- Open the destination inbox and click the verification link to confirm.
- Back in Gmail settings, choose Forward a copy of incoming mail to and select the new address.
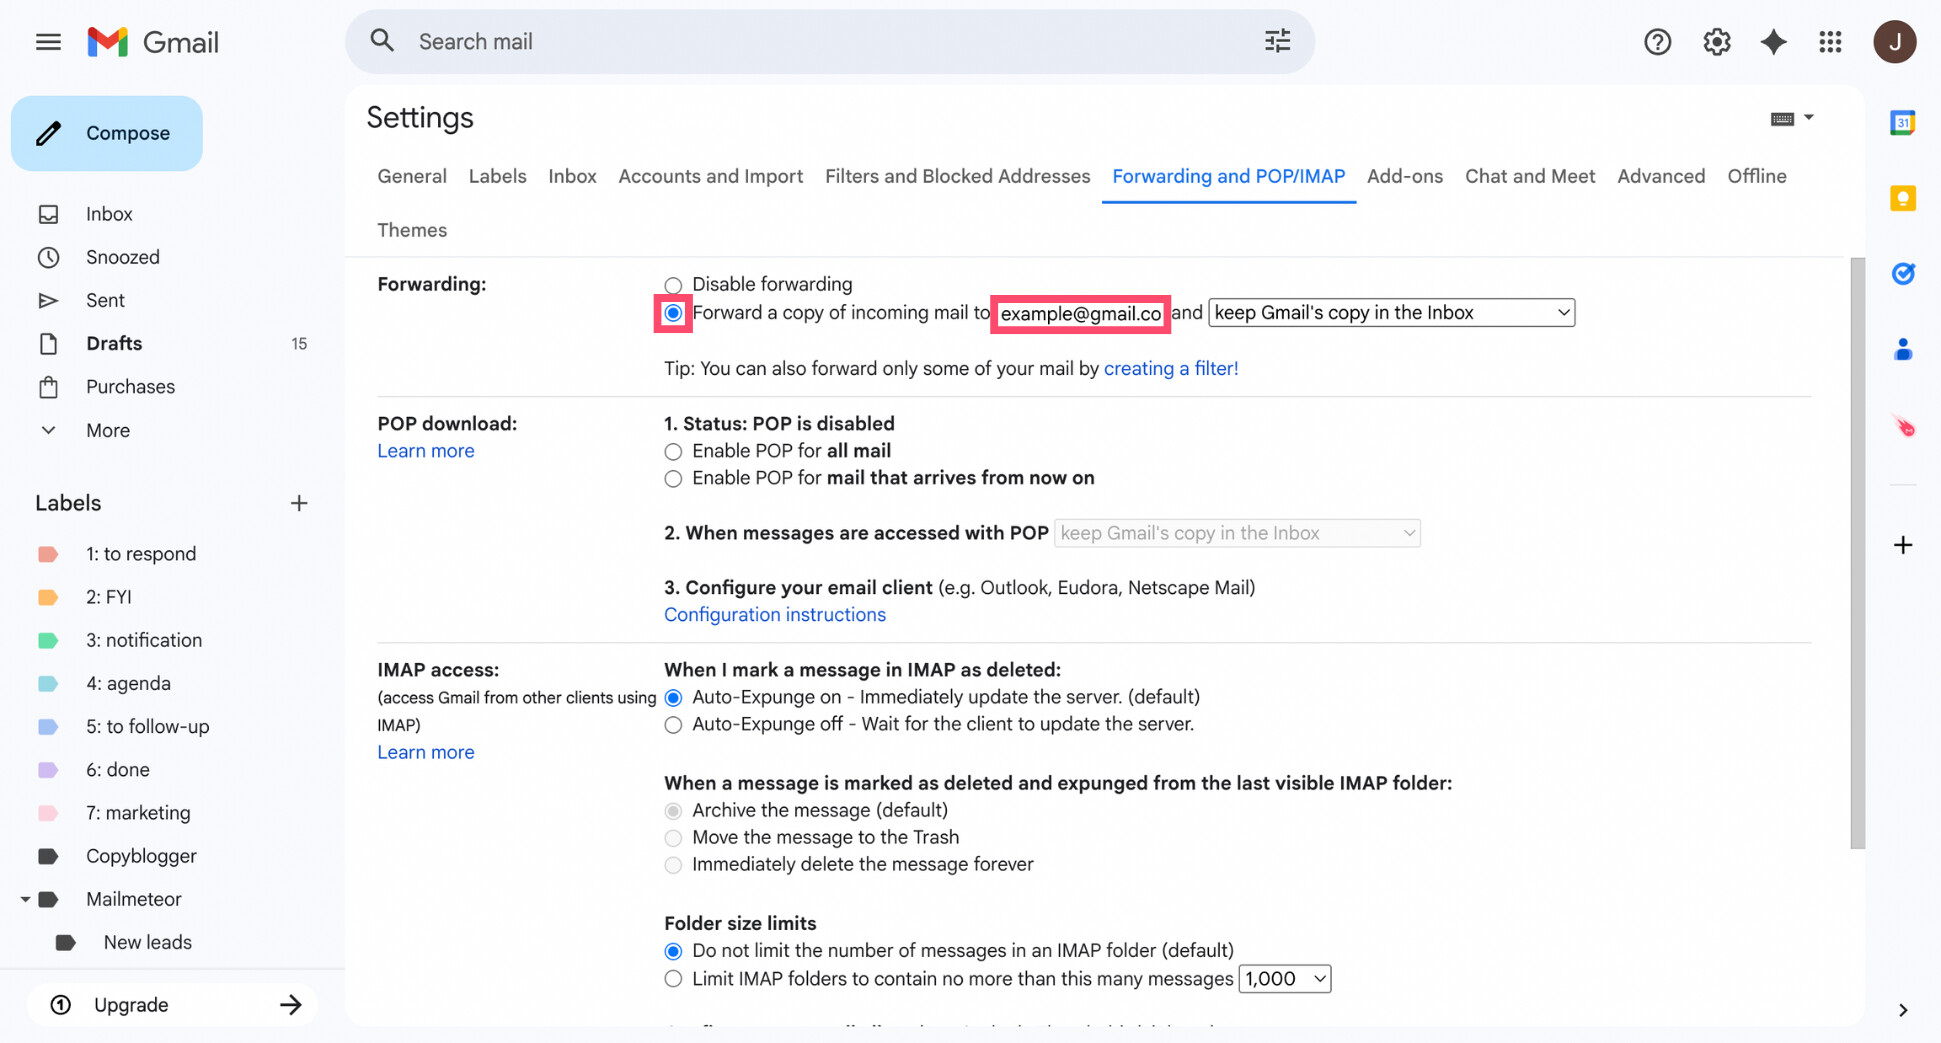
- Choose what Gmail should do with the original emails:
- Keep a copy in the inbox
- Mark them as read
- Archive them
- Delete them after they’re forwarded
- Click Save Changes.
And voilà. Once enabled, Gmail will automatically redirect every incoming email to the address you selected — no manual action required.
Option #2: Automatically Forward Certain Emails
If you don’t want every email redirected, Gmail lets you automatically forward only specific messages using filters. This is ideal if you want to route emails based on the sender, subject line, keywords, or other criteria.
Here’s how to automatically forward certain emails in Gmail:
- Open Gmail.
- Click the search bar at the top, then select Show search options.
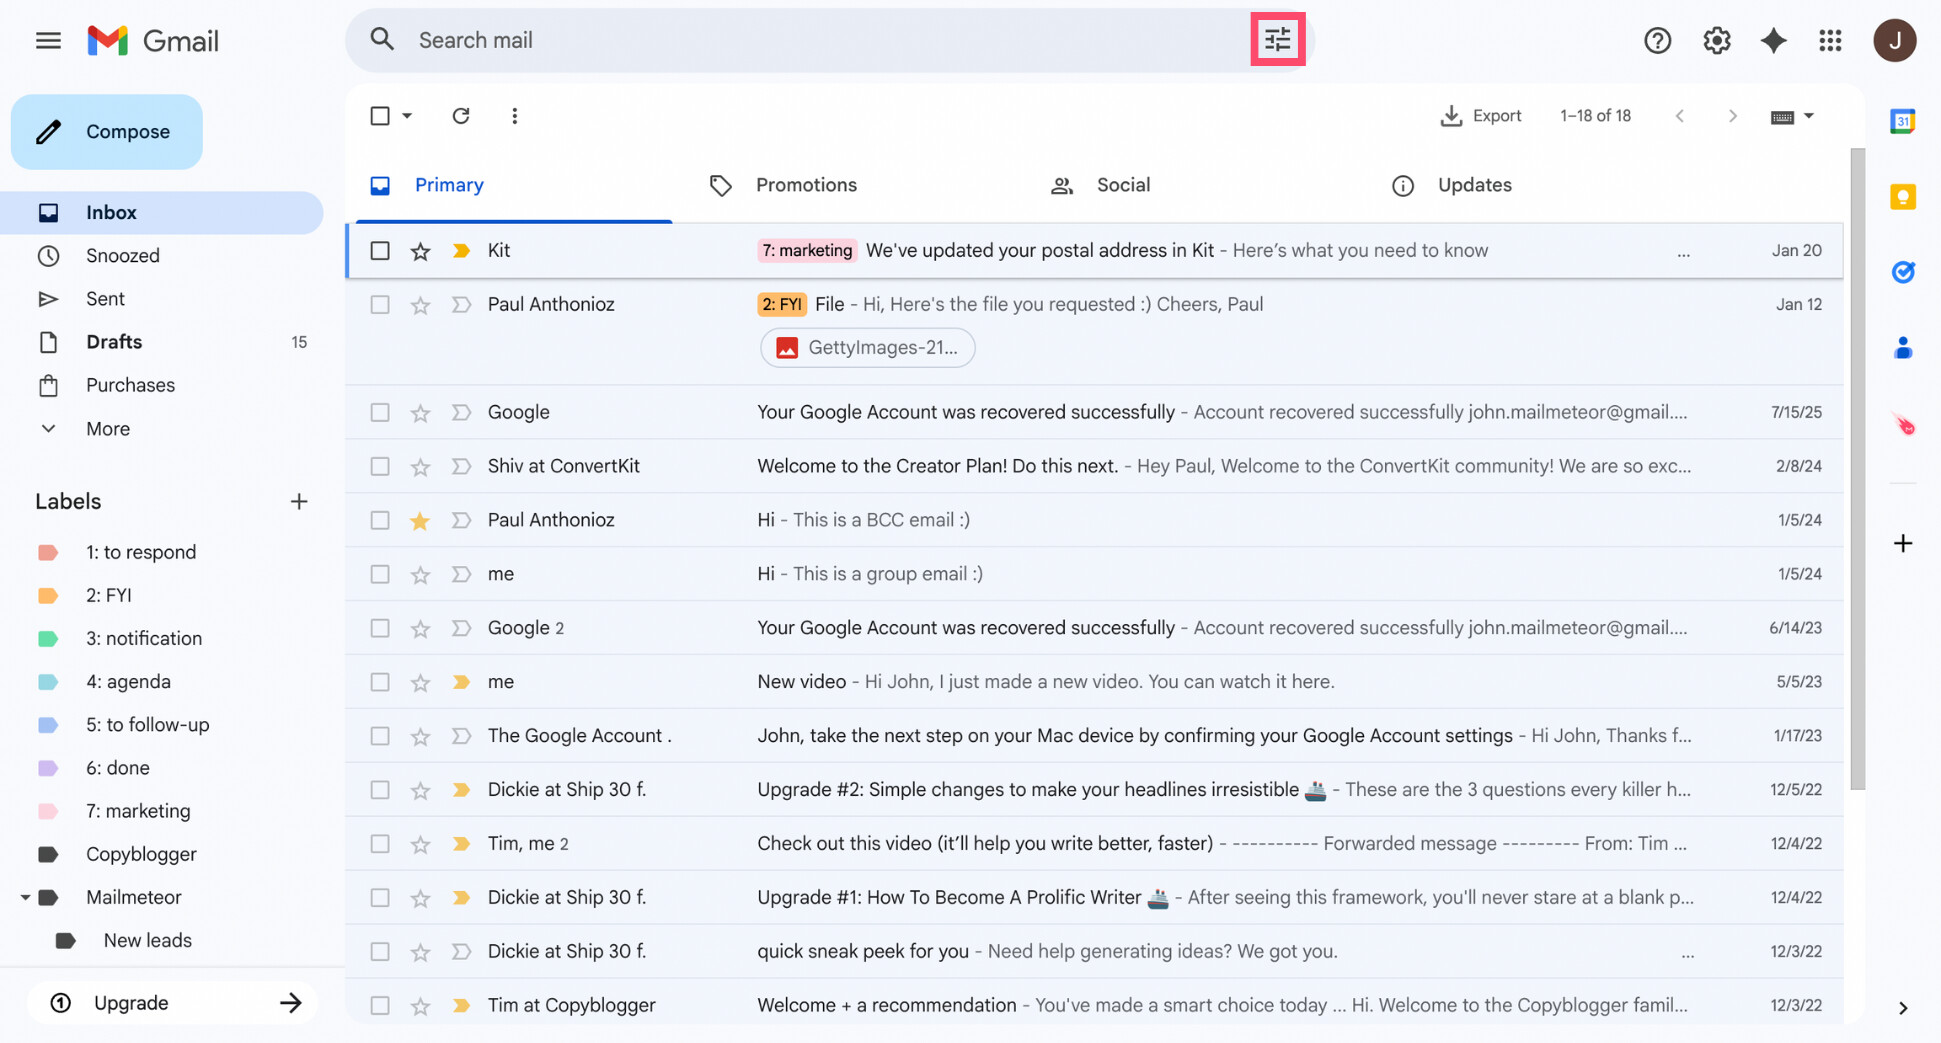
- Define your criteria (sender, subject, keywords, etc.).
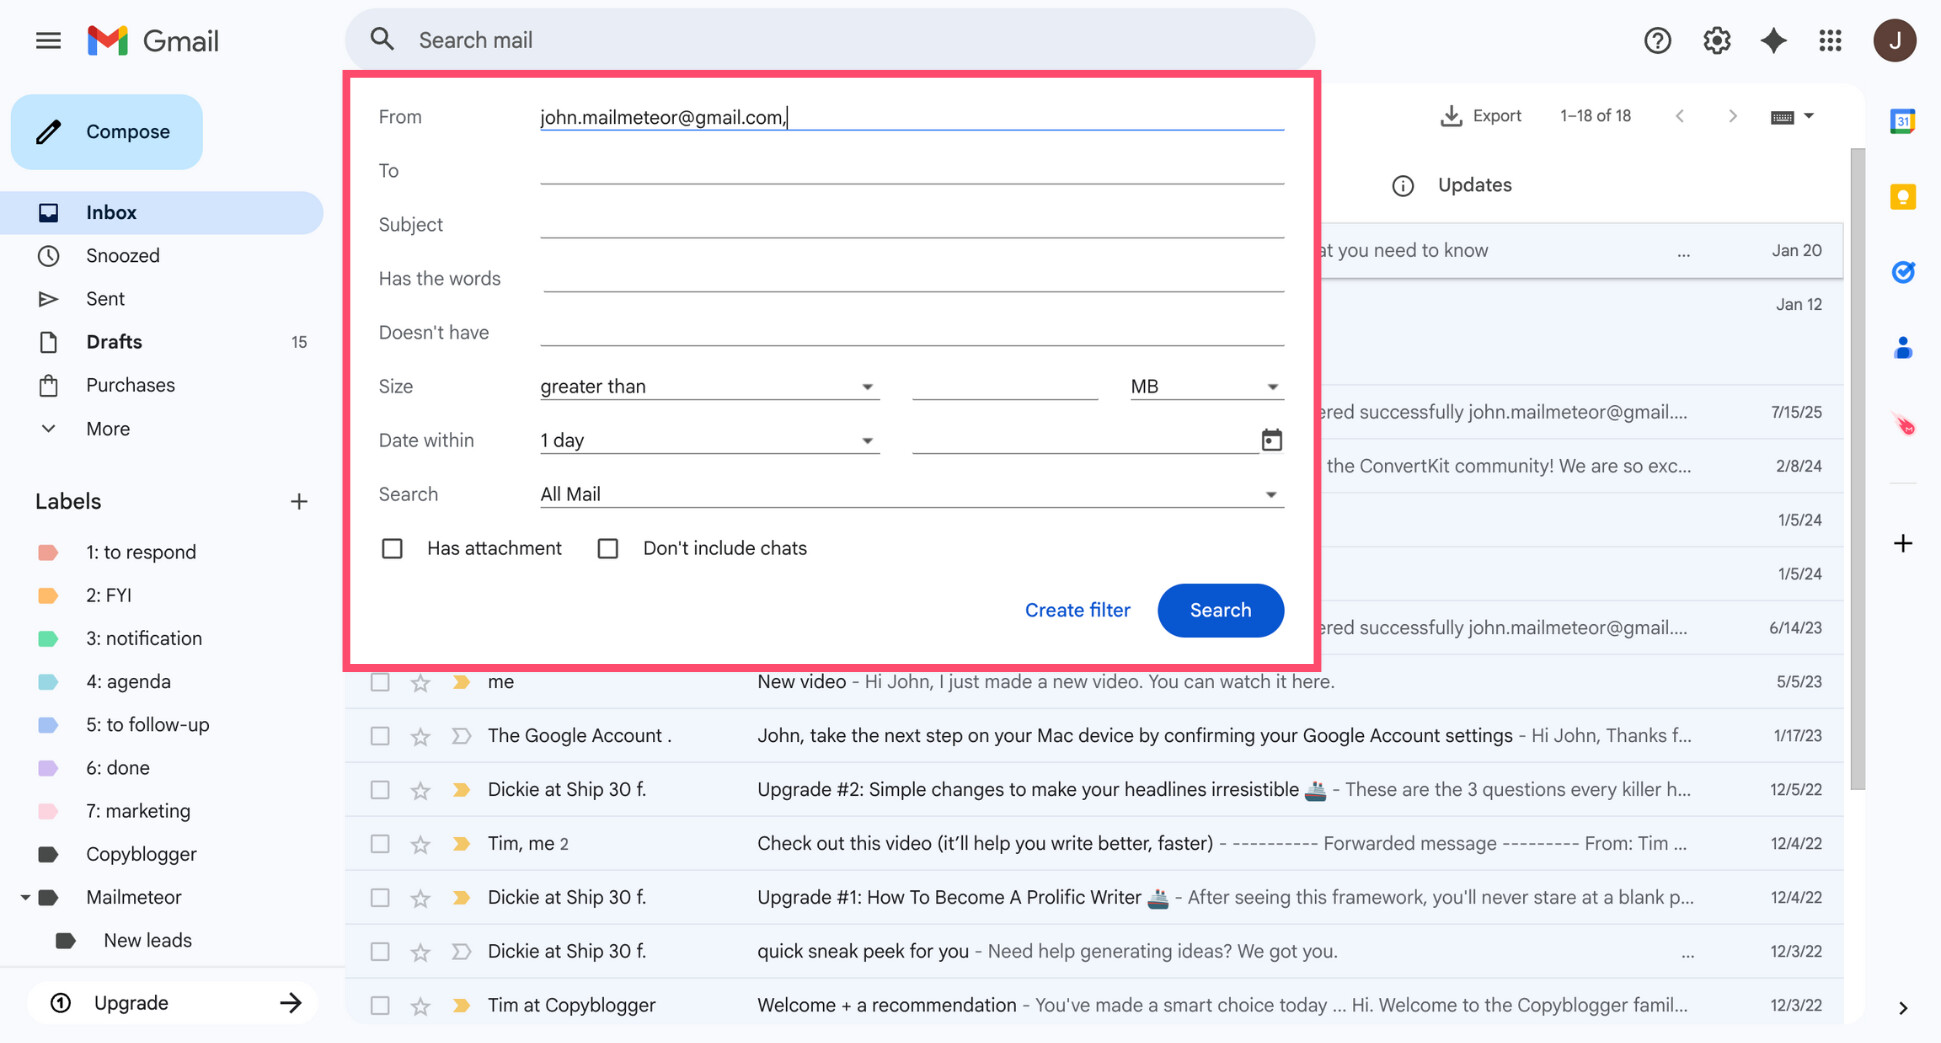
- Click Create filter.
- Check Forward it to, then choose the email address you want to redirect messages to. If you haven’t added a forwarding address yet, Gmail will prompt you to do so first.
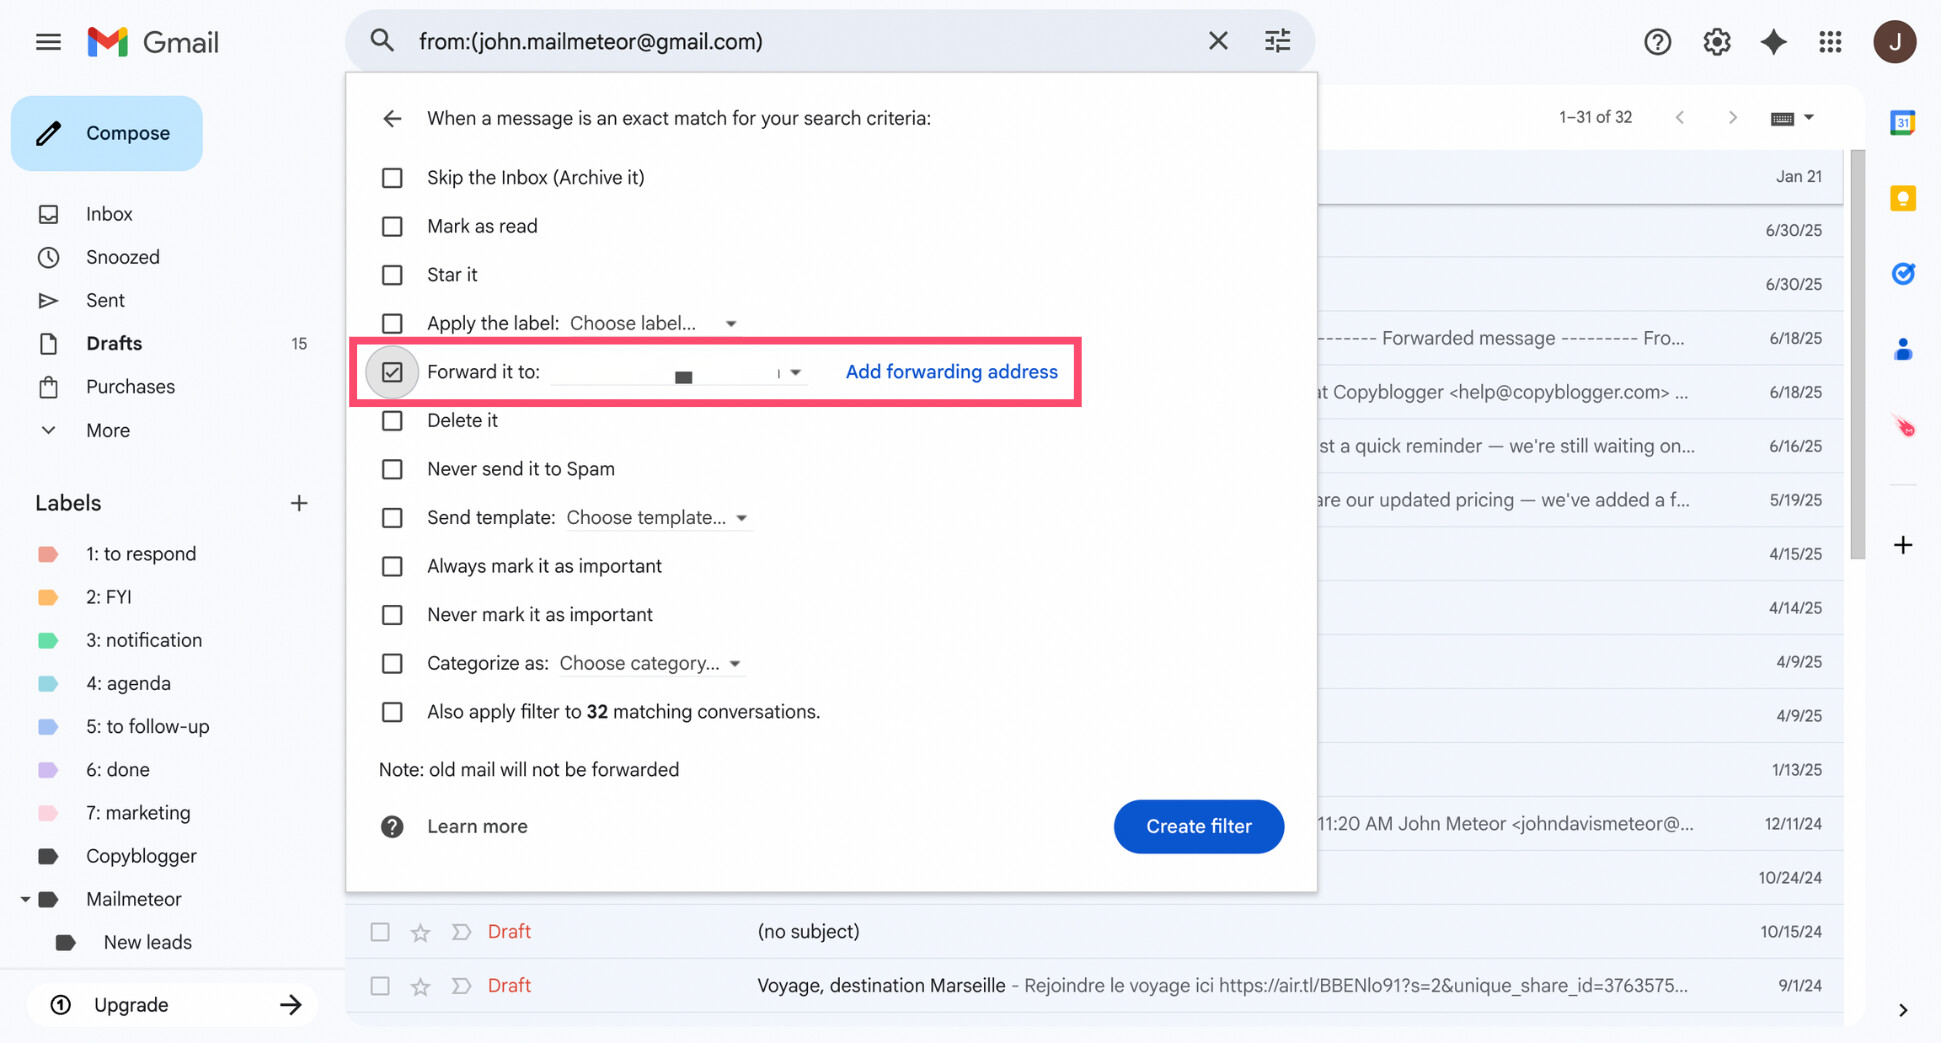
- Click Create filter to activate it.
And that’s it. From now on, Gmail will automatically forward only the emails that match your filter — without touching the rest of your inbox.
Option #3: Automatically Redirect Emails to a Folder
Not every redirect needs to send emails to another address. Sometimes, the goal is simply to move messages out of your main inbox and keep things organized. Gmail lets you do this by automatically applying labels.
Here’s how to automatically redirect emails to a folder in Gmail:
- Open Gmail.
- Click the search bar at the top, then select Show search options.
- Define your filter criteria (sender, subject, keywords, etc.).
- Click Create filter.
- Check Apply the label, then choose an existing label or click New label to create one. You can also check Skip the Inbox if you don’t want these emails to appear in your main inbox.
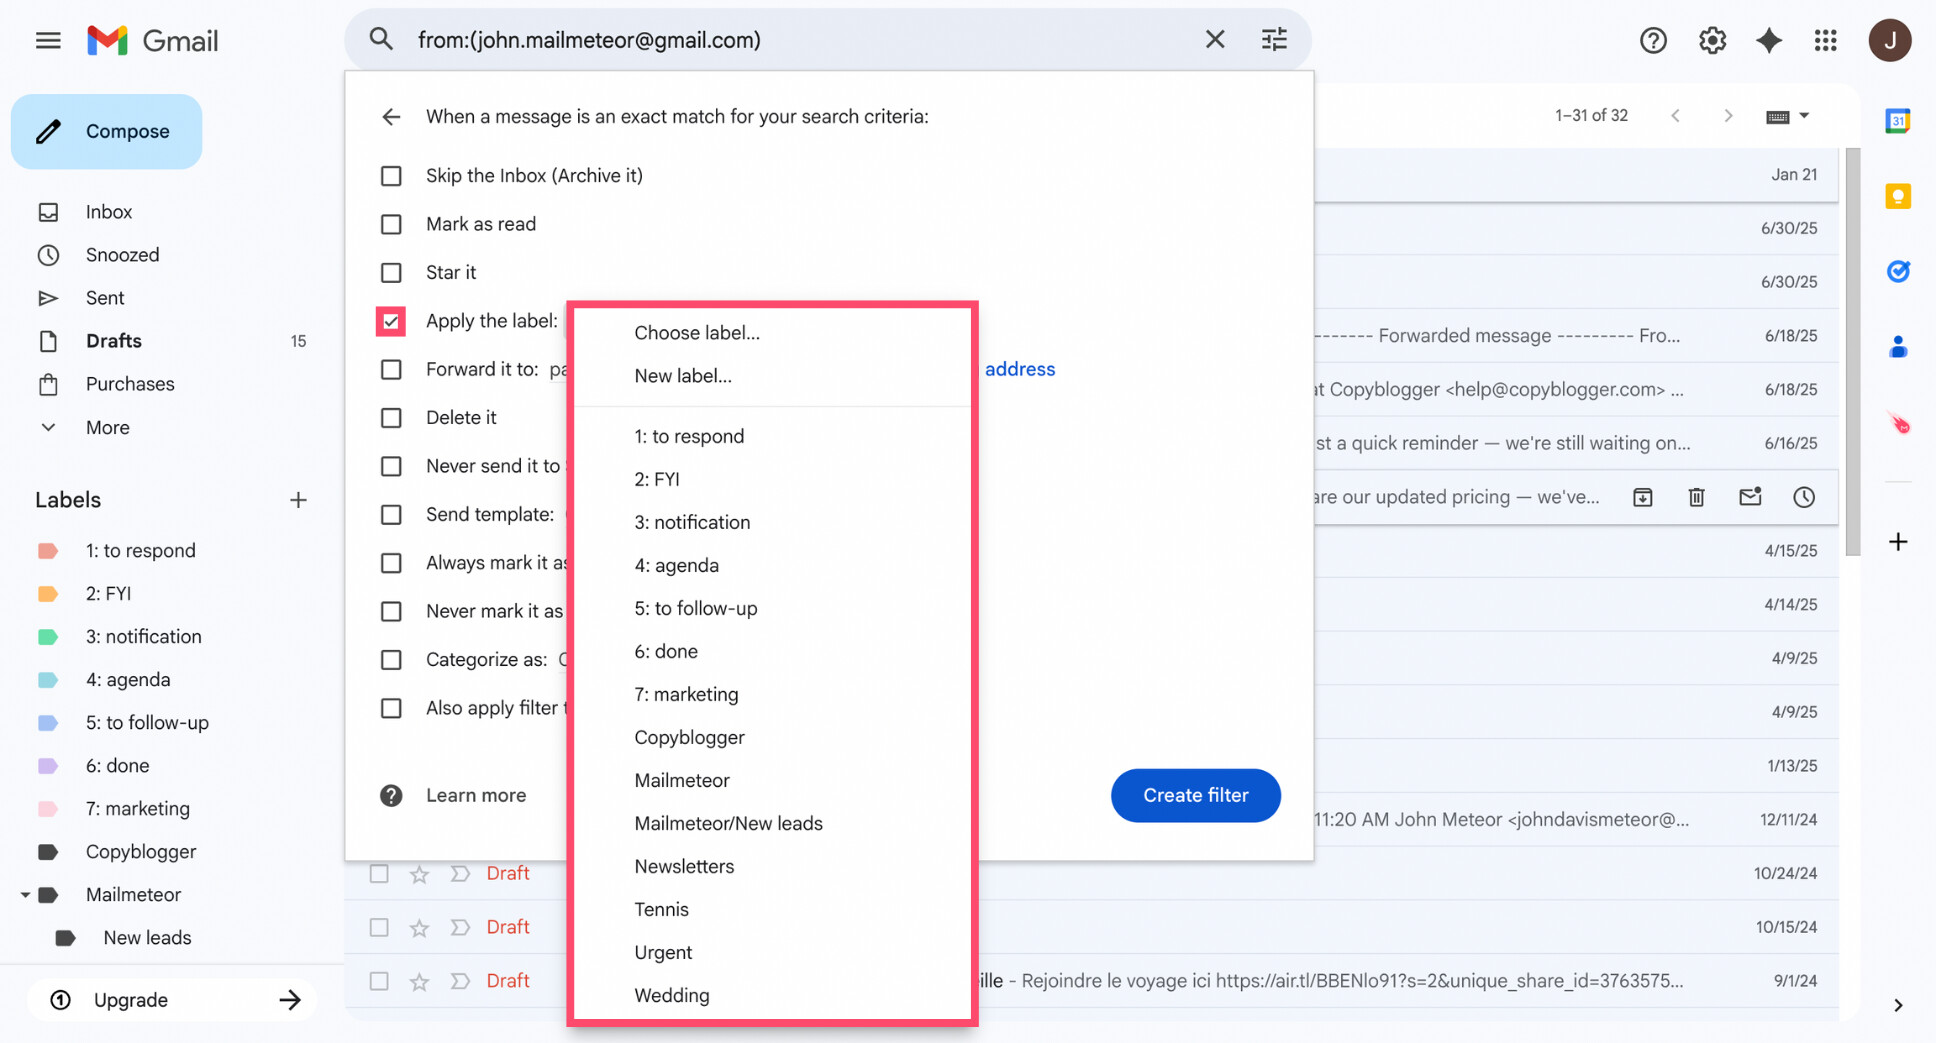
- Click Create filter to activate it.
And done. From now on, any email matching your rules will be automatically moved into the selected label — keeping your inbox clean and clutter-free.
How to Stop Redirecting Emails in Gmail
If you no longer need emails to be redirected, you can stop it at any time. The steps depend on how you originally set up the redirect.
Disable Auto-Forwarding
If you enabled account-level forwarding, here’s how to turn it off:
- Open Gmail.
- Click the gear icon (⚙️), then select See all settings.
- Open the Forwarding and POP/IMAP tab.
- Under Forwarding, select Disable forwarding.
- Click Save Changes.
All set. New messages will now stay in your Gmail inbox instead of being automatically transferred to another email account.
Clear Redirect Filters
If you redirected only specific emails using filters:
- Open Gmail.
- Go to Settings > See all settings.
- Navigate to the Filters and Blocked Addresses tab.
- Find the filter that’s forwarding or routing emails.
- Click Edit to modify it, or Delete to remove it entirely.
- Save your changes.
And voilà. Once the filter is removed or updated, Gmail will stop redirecting those messages to another address or moving them to a specific folder.
Conclusion
Gmail makes it surprisingly easy to redirect emails automatically — once you know where to look. Whether you want to forward everything to a new address, route only certain messages with filters, or quietly organize emails into folders, Gmail’s built-in tools can handle it without any manual work.
The key is picking the method that matches what you’re trying to do:
- Use account-level forwarding to redirect all emails when you’re switching inboxes or consolidating accounts.
- Use filters to redirect only specific emails based on the sender, subject, or keywords.
- Use labels to automatically route messages into folders and keep your inbox clean and focused.
And if redirecting emails is just one part of a bigger inbox problem — too many messages, forgotten replies, or messy conversations — an AI email assistant can help you get more work done, in less time.
Mailmeteor’s free Gmail AI assistant helps you:
✍️ Write clearer emails faster with AI
🗂️ Organize conversations automatically
⏰ Schedule smart follow-ups so nothing slips through
📊 Track opens and replies — directly inside Gmail
📦 Export emails when you need to migrate data or keep a local copy
👉 Try Mailmeteor for Gmail (it’s free) and turn your inbox into a more productive workspace.
FAQs
Does Gmail support email redirect?
Yes — Gmail supports email redirection through its forwarding feature. You can automatically redirect all incoming emails to another address, or redirect only specific emails using filters.
Can I redirect emails based on subject, sender, or keywords?
Yes. Gmail filters let you redirect emails based on specific criteria like the sender’s address, subject line, keywords, or attachments. Only emails matching your filter will be redirected.
Can I redirect Gmail emails to multiple addresses?
While Gmail only supports forwarding all emails to one address at the account level, you can redirect emails to multiple addresses using filters. By creating separate filters (each forwarding matching emails to a different address), you can route emails to multiple recipients automatically.
Is email redirect different on Google Workspace?
Yes. Google Workspace admins can set up server-side redirects at the domain level, allowing emails to be redirected automatically — even before they reach a user’s inbox. This isn’t available on free Gmail accounts.
Why is Gmail email redirect not working?
Common reasons include:
- The forwarding address hasn’t been verified
- Forwarding isn’t fully enabled in Gmail settings
- Filters are misconfigured or conflicting
- Google Workspace admins have restricted forwarding
Double-check your forwarding settings, confirm the destination address, and review any active filters to fix the issue.